Saturday, June 30, 2007

Inside the Tipi

Fireplace, kitchen, office and bed. Oh, and library. Sleeping in the tipi is snug and cozy. It's a soft environment (except when I broke my toe on a rock one night.) The spot between the bed and the rocks is where my dog chooses to sleep.

It's a comforting feeling, having her at my side.

It's beautiful to have a small fire in the tipi. It glows from the outside, and inside, with the smoke flap set properly, the smoke goes straight up. It is not a smokey environment at all. As I've learned, it requires a nice hardwood in small pieces, so that the fire is mostly flames. Keep it small. The tipi gets very warm and the hot stones keep it warm for hours after the fire goes out.

I had to take half the lacing pins out to get the couch in. Arg. But it's worth it, to have a cozy place to sit and knit, read and write.


I have to thank my friends for all their help. My daughter for helping set up the tipi even after she just flew in from college, the neighbors/property owners who have been awesome in every way -- making a road and landing pad, setting up the tipi, lending me freezer space, cutting firewood (and teaching me to split it!), wonderful company, and my friend S, who had been one in a million.

The neighbors' dog, a giant Golden Retriever male named Riley, comes and visits. He likes to take my dog's dead squirrel toy and hide out behind the sofa.


Tipi Liner

A tipi is a geometric wonder. Built on an isoceles triangle, angled against the prevailing winds - once the liner is in, it is as cozy, comfortable and dry as a nest.


The outside cover sits above the ground a few inches and the liner, tied to the inside of the tipi and extending about five feet up, is trapped between the ground cloth and carpeting/skins. So air is sucked in under the outer cover, up between the liner and the cover, and on out the top of the 'chimney' created by properly setting the smoke flaps to the wind.


That's one reason for hanging streamers, ribbons, feathers (or scalps) from the top of the poles. You can look up and see the wind direction so you know how to adjust the flaps (keep in mind that wind speed/direction can be different 24 feet in the air than from the ground). They also help keep birds away. And they are beautiful.


Wrinkles

Wrinkles are bad. At 50, I look in the mirror with the heart of a 29 year old and stare in amazement at the changes in my face. In a tipi, it means something isn't quite right...the poles aren't set properly or the cover has slipped down a bit from the lifting pole.

For me, a novice, I struggled with my friend for hours to get them out. It was the most challenging part of putting up the tipi. First time up, it looked like this:

So we pulled the poles in (not advised...almost impossible once they are pulled out), undid the few stakes we had put in, and shook the hell out of the cover from the back, like shaking a sheet out over a bed to straighten it out. An 80 pound sheet. We made an improvement. Finally her husband showed up and solved some big problems quickly. So our two woman tipi was really a three woman plus a guy here and there in a pinch tipi.
And wrinkles are a part of life and a part of tipis. The longer it stands, the more they relax and the more I come to accept them. I've studied them and think I understand what needs to change the next time I put it up. I'll try again someday. When it all gets used to itself, it will be smoother.

Tuesday, June 26, 2007

Putting on the Cover

There are several steps to putting on the cover. First, it has to be correctly attached to the lifting pole: the sturdiest pole and the last to go in. Next, it is lifted and turned. This is the most strenuous part of the job. Then it gets wrapped around the poles (which are not in their final position yet).

Get the lacing pins set -- in a new canvas, this is no small feat. We worked on stretching the buttonholes prior to lifting, but it still was stiff. Plus, the pins needed to be whittled, which resulted in the only injury of the day (besides some nasty nettle stings). Someone...not saying who but not me...buried a chisel in her calf. Now me, I'm busy these days trying not to cut my finger off with my hatchet.


Get a few stakes in the ground in case a wind comes up. Then start arranging poles (from the inside) until it's all tight. Easier said than done for a bunch of novices.


Poles Up

First the tripod goes up. Door pole faces East, and the others are the North and South poles.

This was my first attempt at putting up a tipi. It took three women about four hours (none of us we experienced at it). Followed lots of directions and advice from those who are experienced. It worked, and knowing there was a learning curve and to take our time and go easy with ourselves helped.


The poles get layed in very specifically, and help to hold each other in. Finally, the rope gets 'flicked up' as you circle the tipi four times. This is critical and ceremonial, both.

Small snag: I had made ribbons with feathers to fly from the tops of the poles. This looks nice, but also helps show the wind direction (so you know how to adjust the smoke flaps) and keeps birds away. So we had to take down some poles and start over. Live and learn.


Friday, June 22, 2007

Pole transport


There's lots of ways to carry these things around. The Native Americans used horses, mules and dogs, hundreds of them for a large village.

I used my friend's 16' trailer to get them from Seattle to the island where I'm staying for the summer. He came a long way to help carry the poles back so I could prepare them close to the tipi site. This was a challenge: strapping everything down, hauling it up a busy freeway, carrying each pole across a meadow and into his barn. Not to mention researching oversize load laws for WA state and whether or not we needed to apply for a permit. Then there's driving it all onto and off of a ferry and across some narrow and perilous island roads. For his efforts? Well, see that whiskey barrel planter…? (I threw some bamboo plants in for good measure.)

After the poles were finished, other friends helped take them to the Tipi Landing Pad, an awesome spot they made in the woods just for me. Including logging out a road, stacking wood, and making the pad slightly mounded so moisture would move away, graveling and sanding it, etc. Stuff that takes tractors and chainsaws and things I don't have at hand. Oh, and pickup trucks with contractor racks.

Pole delivery


Fed Ex freight delivery from Montana of 19 lodgepole pines, 26’ long, to my house near Seattle.

They weigh about 20 lbs each.

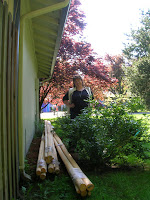
Here are the poles at the end of my 24’ wide house. (This is still when I thought a pole was a pole, and life was easy and carefree…)